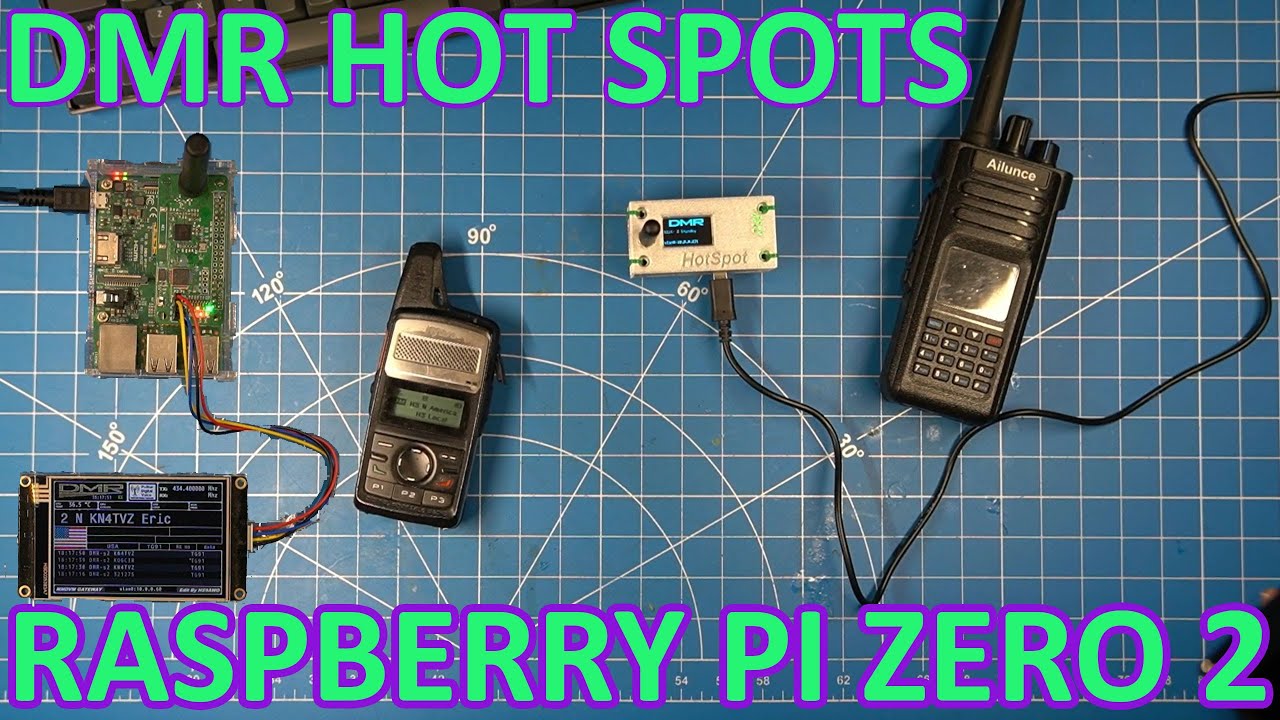
In this engaging tutorial, the creator walks viewers through the process of setting up DMR hotspots using a Raspberry Pi Zero 2 W. The video begins with a brief introduction to the speaker’s existing setup, which includes a Raspberry Pi 3B and an MMDVM hotspot hat. However, the speaker reveals that they want to streamline their setup and utilize the more compact Raspberry Pi Zero 2 W instead. This decision not only optimizes the use of the Raspberry Pi 3B but also provides an opportunity to share the setup process with viewers interested in building their own hotspots.
Choosing the Right Components
The speaker emphasizes the versatility of DMR hotspots, highlighting that they can support various digital modes like DMR, D-Star, YSF, and NXDN simultaneously. This capability opens up a world of possibilities for users, allowing for seamless communication across different networks. The video showcases two setups: one with a Nexion screen for a more advanced interface and another using a basic OLED screen that is more affordable and portable, making it ideal for on-the-go use.
3D Printing and Assembly
As part of the setup, the speaker also demonstrates the process of 3D printing custom cases for both hotspot configurations. Using a metallic PETG filament, they 3D print a case that accommodates the components neatly, enhancing both functionality and aesthetics. Viewers learn how to melt nuts into the printed case for secure mounting of the components, showcasing a practical approach to DIY electronics. The discussion also includes tips on soldering connections and ensuring proper assembly for the components to function effectively.
Software Installation and Configuration
Once the hardware is assembled, the video transitions to software installation, where the speaker guides viewers through formatting SD cards and installing the Pi-Star software. Using tools like SD Card Formatter and Balena Etcher, they emphasize the importance of downloading the correct software version for Raspberry Pi. The video explains how to set up Wi-Fi connectivity, ensuring a smooth transition from hardware to operational status. The step-by-step approach demystifies the process, making it accessible even for beginners.
Final Touches and Testing
After completing the setup, the speaker demonstrates how to access the Pi-Star web interface for configuration. They detail essential settings such as DMR mode, frequency, and user information, ensuring everything is correctly configured for optimal performance. With the system up and running, viewers witness a live demonstration of the hotspot in action, illustrating how to communicate over various talk groups. The excitement is palpable as the speaker engages in real-time conversations, showcasing the functionality of the DMR setup.
In conclusion, this video serves as an invaluable resource for amateur radio enthusiasts looking to create their own DMR hotspots. From selecting the right components and assembling them to configuring software and testing connectivity, the speaker provides comprehensive guidance throughout the process. As the video wraps up, viewers are encouraged to subscribe for more tutorials and share their experiences, fostering a community of learning and collaboration in the world of amateur radio.
Lets update my DMR hot spot with a new Pi Zero 2 board and a 3d printed case, and while I'm at it I'll show you how to set up the most common basic MMDVM hotspot that people buy online with the OLED display.
Watch on YouTube: Setting up some MMDVM DMR hot spots with Raspberry Pi Zero 2 W
Subscribe: Click here