Fixing PowerBook Tunnel Vision with a 3D Printer

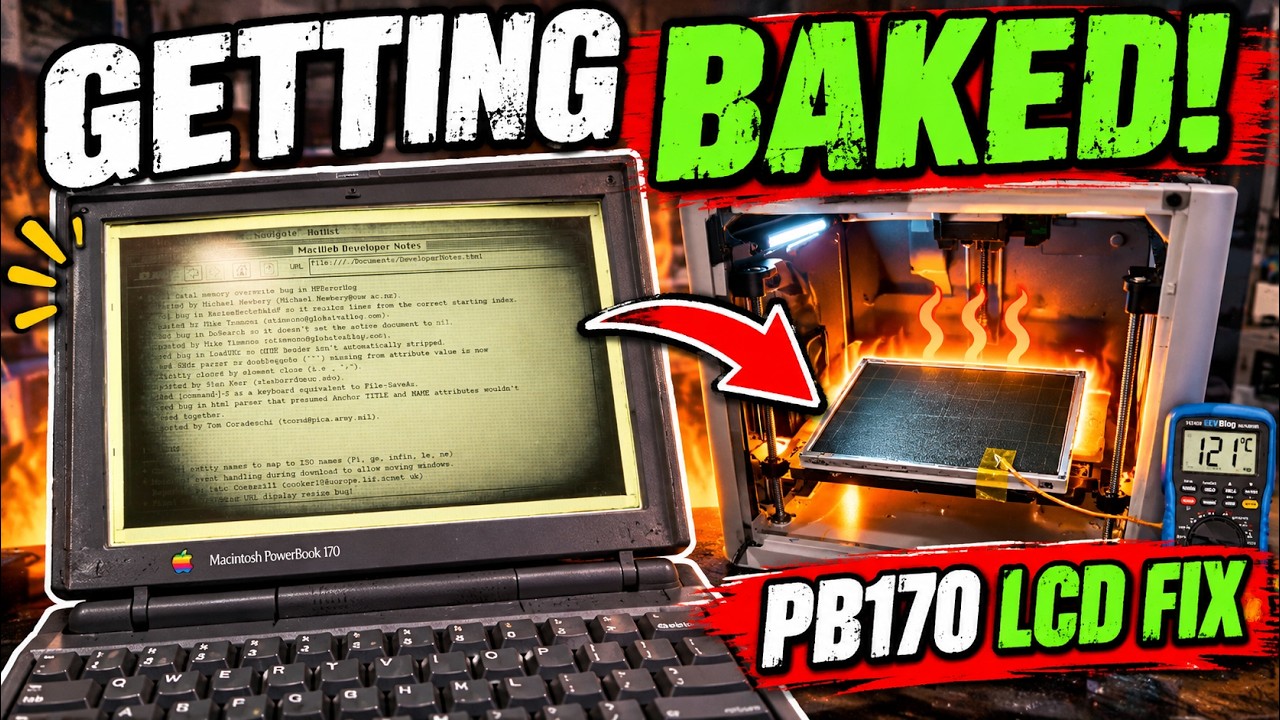
The Macintosh PowerBook 170, a beloved relic of the early computing era, is notorious for its frustrating LCD issue known as “tunnel vision.” As the display warms up over time, the edges of the screen darken and creep toward the center, rendering it nearly unusable. This common ailment has led many vintage tech enthusiasts to seek repairs, and one intriguing solution involves a process as unconventional as it is creative: baking the LCD.

Choosing an Innovative Approach

Rather than risking the integrity of the delicate LCD panel by using a conventional kitchen oven, the presenter in this video opts for a more controlled environment: the heated bed of a Bambu Lab X1 Carbon 3D printer. This decision highlights a growing trend in retro computing where modern technology is repurposed to breathe new life into aging hardware. The speaker carefully removes the LCD panel from the PowerBook and prepares it for the heat treatment on parchment paper, showcasing a blend of ingenuity and caution.

Monitoring the Heating Process

To ensure that the LCD is heated safely and effectively, the presenter uses a K-type thermocouple and a multimeter to monitor the bed temperature meticulously. Starting at a modest 50°C, he gradually increases the temperature to 70°C and finally to approximately 85°C. This methodical approach is crucial, as overheating could damage the sensitive components of the LCD. After maintaining this temperature for about nine hours, he allows the display to cool slowly—a critical step in preventing thermal shock that could further compromise the panel.

The Experiment and Its Implications

This repair process not only serves as an innovative solution for fixing the PowerBook 170’s display but also raises questions about the potential for using 3D printers in hardware repairs. The speaker’s experiment demonstrates that with the right tools and techniques, vintage electronics can be revived, offering a glimpse into the possibilities of retro repair. However, he also wisely cautions viewers that this is an experimental fix on aging hardware, urging them to proceed at their own risk.

A Journey of Restoration

Throughout the video, viewers are treated to a detailed teardown of the PowerBook 170 and a firsthand look at the tunnel vision problem. The engaging narrative builds anticipation as the speaker reveals whether the unconventional baking method proves effective in restoring the LCD to its former glory. This blend of nostalgia, technical ingenuity, and a dash of risk makes for a compelling journey into the world of retro computing.

In conclusion, the experiment not only highlights the challenges of maintaining vintage technology but also underscores the innovative spirit of the retro computing community. By leveraging modern 3D printing technology, enthusiasts can find new ways to tackle old problems, ensuring that these classic devices can continue to be appreciated for years to come.

The Macintosh PowerBook 170 has an infamous LCD problem known as “tunnel vision.” As the display warms up, the edges slowly darken and creep toward the center until the screen can become almost unusable.

Apparently, one of the more interesting fixes is to bake the LCD.

Rather than trust my ancient kitchen oven with a 30+ year old display, I decided to use the heated bed in my Bambu Lab X1 Carbon 3D printer. I removed the LCD panel, placed it on parchment paper, and monitored the actual bed temperature using a K-type thermocouple and multimeter.

I gradually brought the temperature up from around 50°C, then 70°C, and finally approximately 85°C, where I left the LCD for roughly 9 hours before allowing it to cool gradually.

Because apparently my 3D printer is also an LCD repair oven now.

In this video I tear into the PowerBook 170, show the tunnel vision problem, try the heat treatment, and find out whether baking a vintage LCD actually fixes it.

This is obviously an experimental repair on aging hardware, so try it on your own equipment at your own risk.

#PowerBook170 #VintageMac #RetroComputing #Macintosh #LCDRepair #Apple #BambuLab #RetroRepair

Watch on YouTube: Fixing PowerBook Tunnel Vision with a 3D Printer

Subscribe: Click here
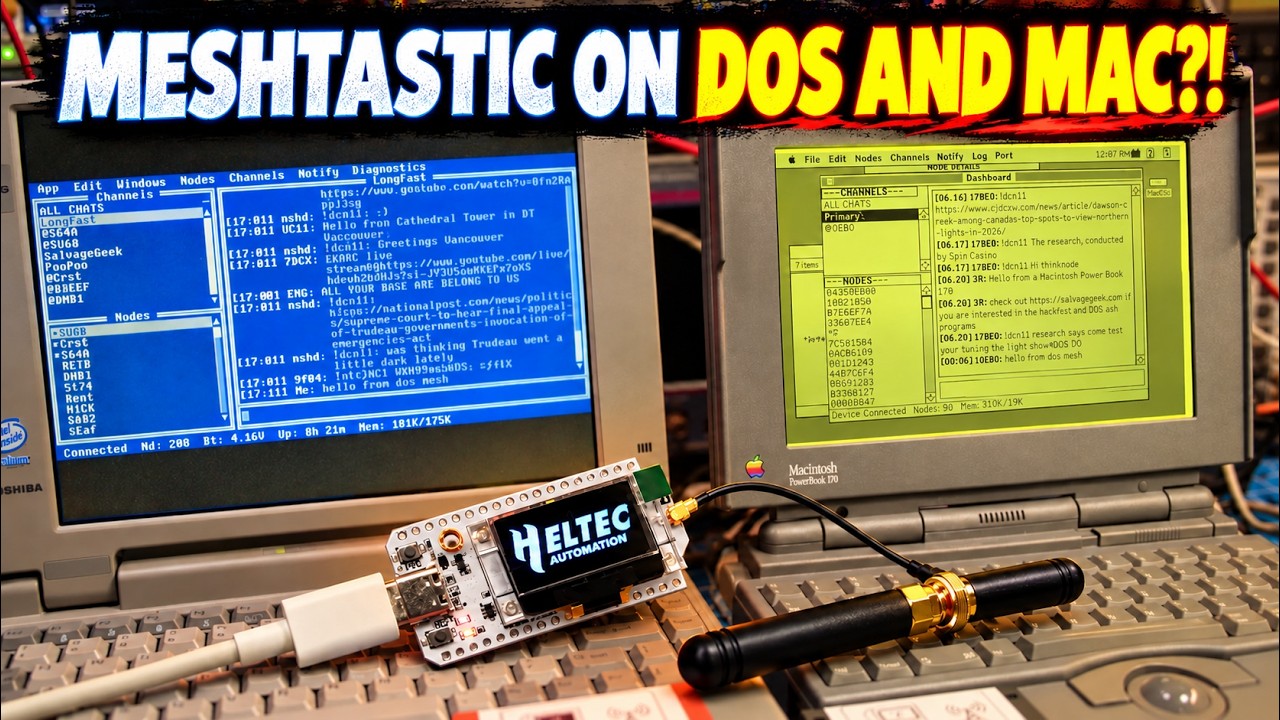
Meshtastic on DOS & MAC?! Meet DOS Mesh + MacMesh II

If you’re a fan of vintage computing and mesh networking, you’re in for a treat! In a recent video, the creator introduces a groundbreaking innovation: DOS Mesh, a Meshtastic client specifically designed for DOS PCs. This new application allows users to interact with Meshtastic radios, effectively creating a mesh network that can facilitate communication between devices in a unique and nostalgic way. The video showcases the interaction between DOS Mesh and MacMesh II, which operates on a classic PowerBook, highlighting the potential for cross-platform communication in the vintage computing space.

Exploring DOS Mesh

The video takes viewers on a tour of the DOS Mesh interface, which is inspired by the classic Phoenix BIOS design. The interface is user-friendly, featuring various functionalities such as channel chats, direct messaging, and an ALL CHATS view that provides a seamless experience for users. Additionally, the ability to view node details and set up channels makes DOS Mesh a comprehensive tool for anyone looking to engage in mesh networking on older hardware. The creator emphasizes the importance of maintaining usability while embracing the retro aesthetic.

Diving into MacMesh II

On the other side of the mesh network, MacMesh II impresses with its vibrant color-coded messaging system. Each message is beautifully displayed in the color corresponding to its channel or originating node, enhancing the visual experience of communication on the platform. Moreover, MacMesh II retains distinctive Mac features, including speech capabilities that further enrich the interaction for users. This combination of functionality and aesthetics makes MacMesh II a standout application for classic Mac enthusiasts.

Future Prospects and Expansions

The creator doesn’t stop with DOS and Mac; there are exciting plans for the future. Versions of DOS Mesh tailored for Windows 3.0 and Windows 95 are on the horizon, as well as a potential lower-memory edition for the 8086/8088 processors. This expansion promises to reach an even broader audience of vintage computing fans, allowing more devices to connect to the Meshtastic network.

Engaging the Community

As the video wraps up, the creator invites viewers to engage by suggesting which vintage computer they would like to see integrated into the mesh network next. This call to action not only fosters community involvement but also sparks curiosity about the endless possibilities of mesh networking across various platforms. Whether you’re a retro computing aficionado or just curious about modern applications of vintage tech, this initiative is certainly worth following.

For those interested in trying out DOS Mesh and MacMesh II, download links are provided in the video description. Embrace the nostalgia and dive into the world of vintage mesh networking today!

Two vintage laptops, two Meshtastic radios, one mesh. In this video I introduce DOS Mesh, a Meshtastic client built to target DOS PCs, and show it exchanging messages with MacMesh II on a PowerBook.

We’ll tour DOS Mesh’s Phoenix BIOS-inspired interface, channel chats, direct messages, ALL CHATS view, node details, and channel setup. Then we’ll look at MacMesh II, including its color-coded messages: each message uses the color of its channel or originating node. MacMesh II also retains its Mac-specific speech features.

Windows 3.0 and Windows 95 versions are planned next. I’d also like to explore a lower-memory 8086/8088 edition later.

Download DOS Mesh: https://salvagegeek.com/dos-mesh/

Download MacMesh: https://salvagegeek.com/macmesh/

See my original MacMesh Video on classic macs: https://youtu.be/8NlcsDqMw7Y?si=JTdZbWD6vHgkw2T8

What vintage computer would you like to see on the mesh next?

#Meshtastic #DOS #VintageComputing

Watch on YouTube: Meshtastic on DOS & MAC?! Meet DOS Mesh + MacMesh II

Subscribe: Click here

Can I Restore This 1989 IBM PS/2 P70? (Part 1)

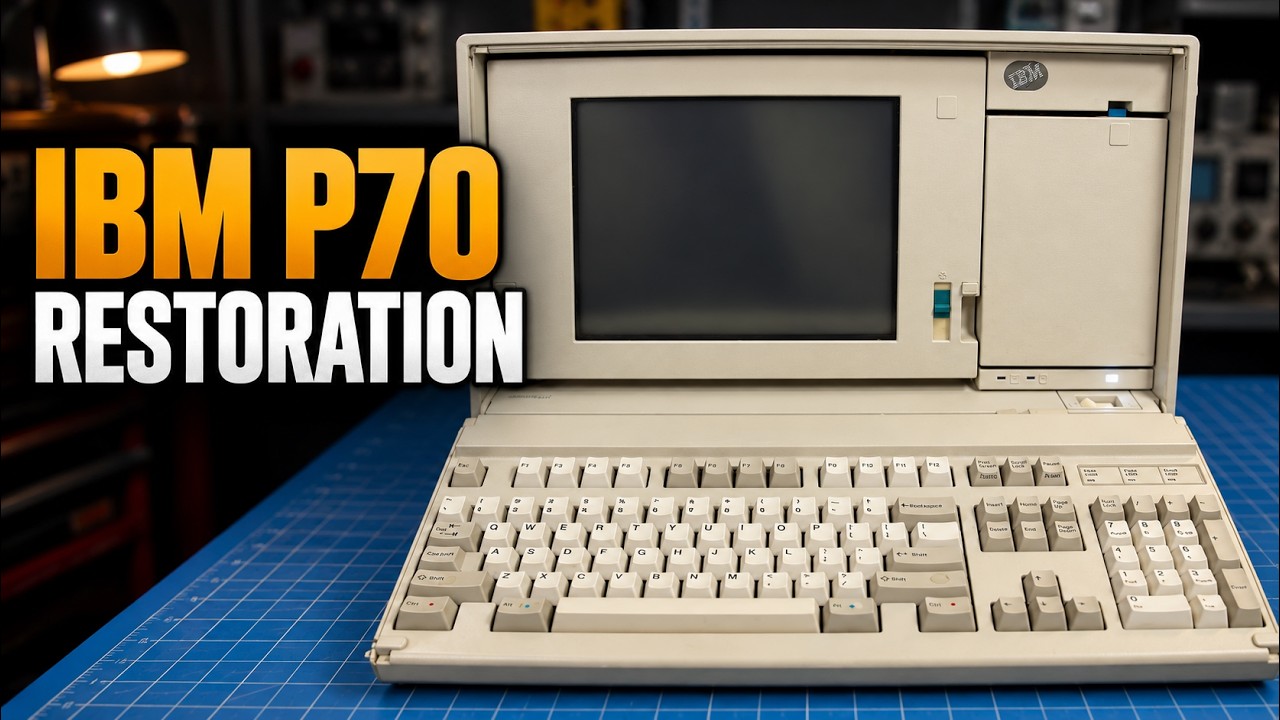
The journey of restoring a vintage computer is often filled with surprises, and the 1989 IBM PS/2 Model P70 is no exception. In this exciting first part of the restoration series, the unboxing and first inspection reveal a portable 386 machine that has remained untouched for decades. Wrapped up and untested, the P70 boasts a gas-plasma display and an original 120 MB hard drive—a testament to its era. However, the restoration process is complicated by the presence of an unreasonable number of different screws, hinting at the intricate design of this retro device.

Initial Inspection and Disassembly

The initial inspection of the P70 sets the stage for what lies ahead. The video showcases the careful unwrapping of the device, leading to a thorough examination of its components. The presenter highlights the unique features of the model, particularly the gas-plasma display, which was a cutting-edge technology in the late ’80s. After the inspection, the real work begins with disassembling the unit, which involves navigating a seemingly endless array of screws, each requiring careful handling to avoid any damage during the teardown process.

Cleaning and Recapping Components

Once the machine is opened up, the focus shifts to cleaning and recapping the floppy disk and hard drive boards. This crucial step not only ensures that the components are free of dust and grime but also revitalizes the aging electronics. Recapping involves replacing old capacitors that may have degraded over time, a common necessity in vintage restorations. The speaker emphasizes the importance of this process for improving the longevity and performance of the device.

Innovative Repairs and Enhancements

In an impressive display of ingenuity, the host fabricates a replacement display hinge using a 3D printer. This innovative solution not only restores functionality to the display but also highlights the blend of modern technology with vintage computing. Additionally, the video shows the process of bracing two broken RAM retainers, ensuring that the memory components are securely held in place. These repairs are essential for the overall stability of the system and demonstrate the presenter’s commitment to preserving the integrity of the original design.

First Power-On and Future Plans

With the restoration tasks completed, the moment of truth arrives as the P70 is reassembled for its first power-on. The anticipation builds as the host prepares to test the machine, marking a significant milestone in the restoration journey. Viewers are left eager for the next installment as the speaker teases further explorations and repairs in Part 2. The excitement of reviving such a classic piece of technology resonates throughout the video, inviting enthusiasts and newcomers alike to stay tuned for more updates on this remarkable restoration project.

An IBM PS/2 Model P70 arrived wrapped up and untested, so we’re going in blind. This 1989 portable 386 has a gas-plasma display, its original 120 MB hard drive, and an unreasonable number of different screws.

In Part 1, I unwrap and inspect it, tear it down, clean and recap the floppy and hard-drive boards, make a replacement display hinge with a 3D printer, and brace two broken RAM retainers. Then it all goes back together for the first power-on.

The restoration continues in Part 2.

#IBMP70 #VintageComputers #SalvageGeek

Watch on YouTube: Can I Restore This 1989 IBM PS/2 P70? (Part 1)

Subscribe: Click here

The Commodore 1802 Lives! Fixing Its Vertical Collapse

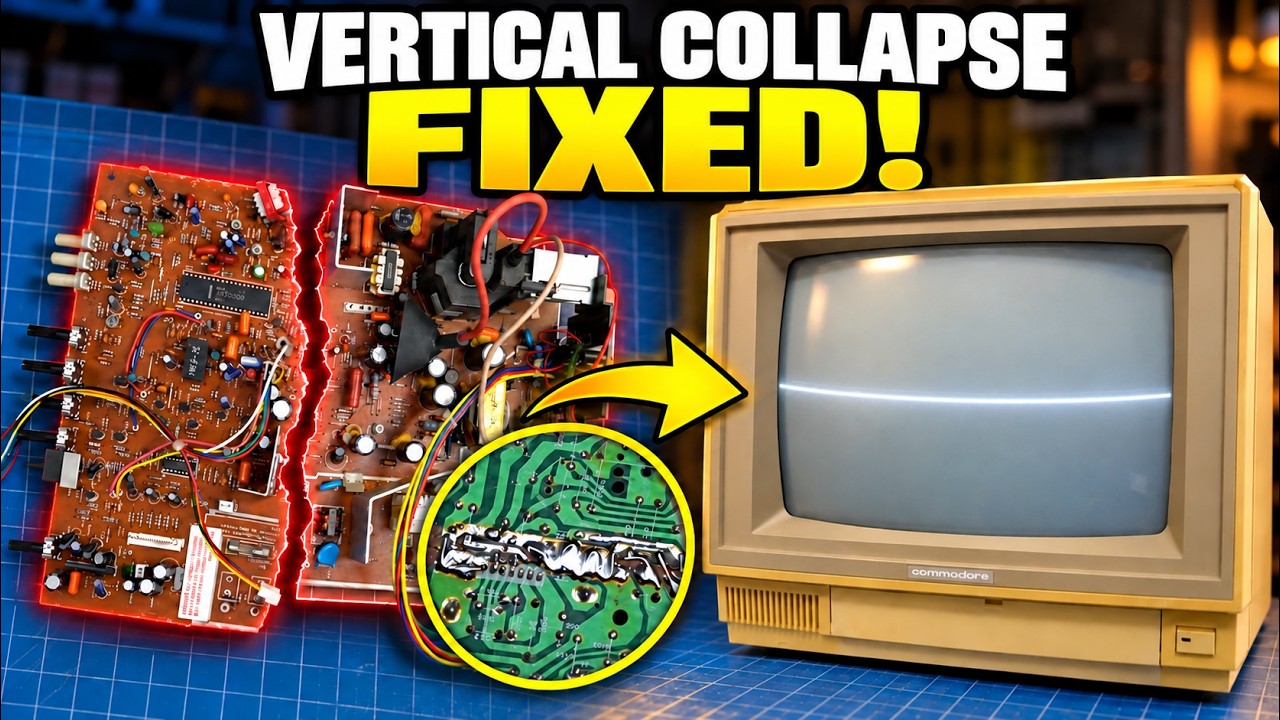
The journey of restoring a Commodore 1802 monitor is not for the faint of heart, as demonstrated in a recent YouTube video detailing a challenging repair process. The monitor arrived in a dire state, with its main circuit board snapped completely in half. The repair began with a meticulous mechanical restoration of the board, where the presenter painstakingly reconnected every broken trace and addressed a damaged transformer connection. After these initial repairs, the first signs of life emerged with high voltage and a picture, albeit a troubling single horizontal white line across the screen.

Diagnosing the Vertical Collapse Fault

With the initial repairs yielding a flicker of hope, the next step involved diagnosing the vertical collapse fault that was preventing a complete image from displaying. The technician systematically checked the power supplies and the vertical signal path, indicating a thorough understanding of the CRT monitor’s inner workings. It was during this detailed examination that the presenter identified the root cause: an open resistor within the vertical output circuit. This crucial find opened the door to a potential resolution of the monitor’s issues.

Repairing the Vertical Output Circuit

Replacing the faulty resistor proved to be the turning point in the repair process. With the new component in place, the Commodore 1802 monitor finally came back to life, producing a full and vibrant picture. This moment was a testament to the technician’s skills and persistence, highlighting the intricate nature of CRT repairs, where even the smallest component can make a significant difference in performance.

Testing the Repair with Classic Gaming

To put the restored monitor to the test, the technician connected it to an original Nintendo Famicom and fired up a game of Super Mario Bros. The nostalgic visuals brought a sense of joy and accomplishment, showcasing the successful repair of the monitor. While minor geometry adjustments were still needed for the picture to be perfect, the transformation from a broken piece of equipment to a functioning retro gaming monitor was nothing short of impressive.

Safety Considerations in CRT Repair

This repair adventure serves as a reminder of the inherent risks involved in working with CRT technology. The video emphasizes the potential for lethal voltages present within CRT monitors, which can remain even after the unit has been unplugged. Such warnings are crucial for anyone considering similar repairs, underscoring the importance of understanding safety procedures before diving into electronics repair.

In conclusion, the restoration of the Commodore 1802 monitor not only highlights the challenges and rewards of vintage electronics repair but also reinforces the joy of breathing new life into classic technology. For enthusiasts and repair aficionados alike, the journey of reviving such a piece is both an educational experience and a nostalgic trip down memory lane.

This Commodore 1802 monitor arrived with its main circuit board snapped completely in half.

After mechanically repairing the board, reconnecting every broken trace and repairing a damaged transformer connection, I finally got high voltage and a picture—but that picture was nothing more than a single horizontal white line.

In this video, I work through the vertical-collapse fault, check the power supplies and vertical signal path, and eventually discover an open resistor in the vertical output circuit. With that replaced, the monitor finally produces a complete picture again.

To test the finished repair, I hooked up an original Nintendo Famicom and played a little Super Mario Bros. The picture still needs a couple of minor geometry adjustments, but considering where this monitor started, I’m calling this repair a win.

Part one: https://www.youtube.com/watch?v=yDrcbobGRkI

CRT monitors contain potentially lethal voltages, including voltages that may remain present after the monitor has been unplugged. Do not attempt these repairs unless you understand the necessary safety procedures.

#Commodore #CRTRepair #RetroComputing #ElectronicsRepair #Famicom

Watch on YouTube: The Commodore 1802 Lives! Fixing Its Vertical Collapse

Subscribe: Click here

I Built a Janky Indoor Retrobright Box… And It Actually Worked

In a quest to restore the faded plastics of retro computers, one DIY enthusiast set out to create an indoor retrobright box that could effectively whiten yellowed cases without relying on sunlight. The result was an unconventional yet surprisingly effective setup that utilized everyday materials to tackle a common problem faced by vintage computer collectors. This project demonstrates that innovation can flourish even in the most makeshift conditions.

The Ingredients of Innovation

The creator of this janky retrobright box assembled a variety of components: a 102L plastic storage tote, aluminum foil, two UV lights, a heating blanket, and hydrogen peroxide. Duct tape played a starring role in holding everything together, highlighting the improvisational spirit behind this project. By combining these elements, the builder aimed to create a controlled environment where UV light could penetrate and activate the hydrogen peroxide, leading to the restoration of the discolored plastic.

The First Test: Commodore 1802 Monitor Case

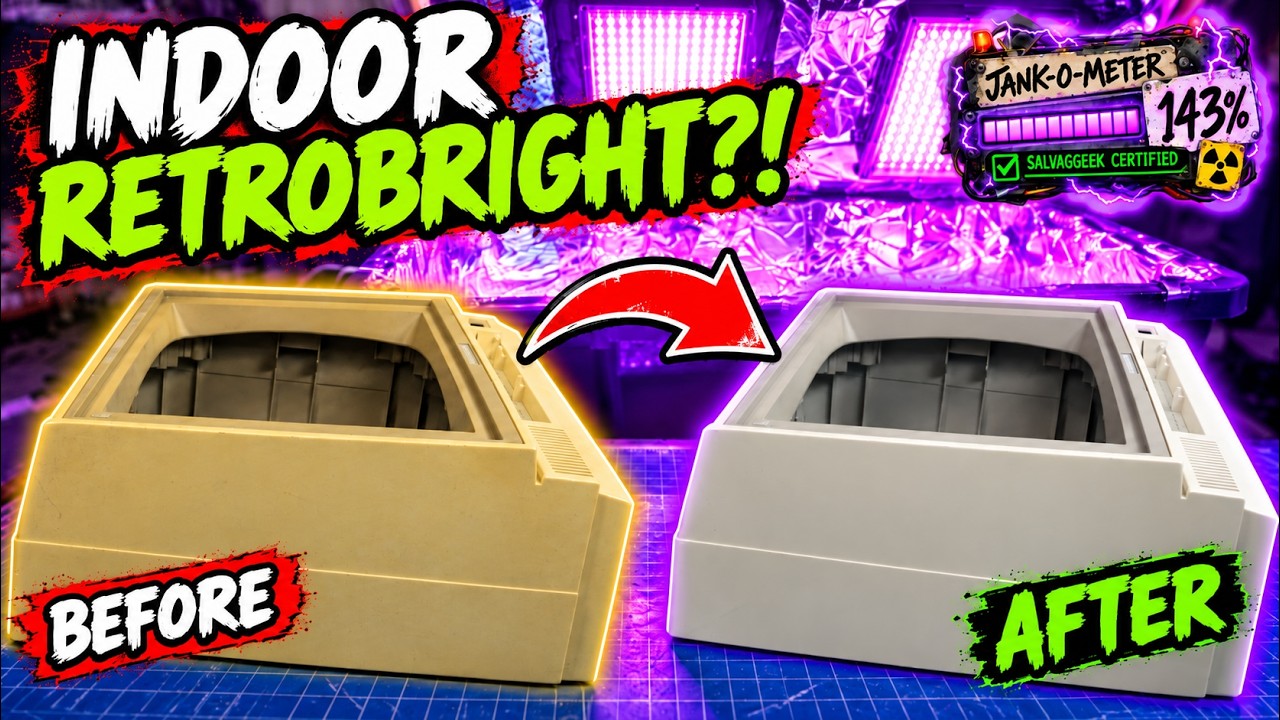
The first real test involved retrobrighting the extremely yellowed case of a Commodore 1802 monitor. After a 48-hour stint in the makeshift chamber, the results were surprisingly positive. The retrobright process worked effectively, though not without its flaws. The case underwent a noticeable transformation, proving that even a “janky” setup could yield impressive results.

Lessons Learned and Future Improvements

During the experimentation, it became clear that there were several areas for improvement. The heating system, for instance, was deemed mostly ineffective, and there were issues with uneven UV exposure, which resulted in parts of the case not receiving adequate treatment. The creator acknowledged the need for more heat, better insulation, and increased peroxide concentration in future iterations of the retrobright box. Additionally, allowing more clearance around the parts would help achieve a more uniform restoration process.

A Community of Enthusiasts

This project not only showcases the resourcefulness of the creator but also invites others who are passionate about retro computing and electronics repairs to join the journey. By sharing the ups and downs of this DIY endeavor, the builder encourages viewers to embrace their creativity, even when working with limited resources. The excitement surrounding retro computers, questionable repairs, and homemade tools continues to foster a vibrant community of enthusiasts eager to restore and celebrate vintage technology.

So, if you find joy in the world of retro computing and the art of DIY repairs, consider subscribing for more engaging content that showcases the thrill of experimentation and the joy of restoring vintage items. After all, sometimes the most unconventional methods yield the most satisfying results!

I wanted a way to retrobright old computer plastics indoors without relying on sunlight, so I built possibly the least professional UV chamber imaginable.

The ingredients: a 102L plastic storage tote, aluminum foil, two UV lights, a heating blanket, a clear inner container, hydrogen peroxide… and a concerning amount of duct tape.

For the first real test, I threw in the extremely yellow case from my Commodore 1802 monitor and left it running for 48 hours.

And somehow… the thing actually worked.

Mostly.

In this video I build the indoor retrobright box, test the peroxide cream method, discover that my heating system is basically useless, and find out what happens when part of the case doesn't get enough UV exposure.

There are definitely a few things I'll change for version 2 — more heat, better insulation, more peroxide, and more clearance around the parts — but for a quick experiment made out of junk I already had, the results were surprisingly good.

If you enjoy retro computers, questionable electronics repairs, homemade tools, and engineering decisions of increasingly dubious quality, consider subscribing.

#Retrobright #Commodore #VintageComputers #RetroComputing #Restoration

Watch on YouTube: I Built a Janky Indoor Retrobright Box… And It Actually Worked

Subscribe: Click here